Sculpture 1
Relief In Progress Post
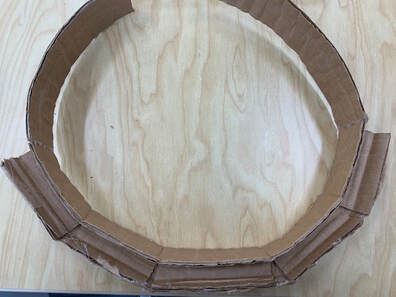
1. I plan to add cardboard roses on the platform I formed on the band of the crown. After that I will be adding pyramid shaped pieces to the back of the crown with an aspect of relief by taking of the first layer of cardboard in some areas.
2. The most difficult part so far has been getting the right measurements to have the platform on the crown be even. I think planning the structure was the easiest part.
2. The most difficult part so far has been getting the right measurements to have the platform on the crown be even. I think planning the structure was the easiest part.

|
|
Relief Finished Blog Post
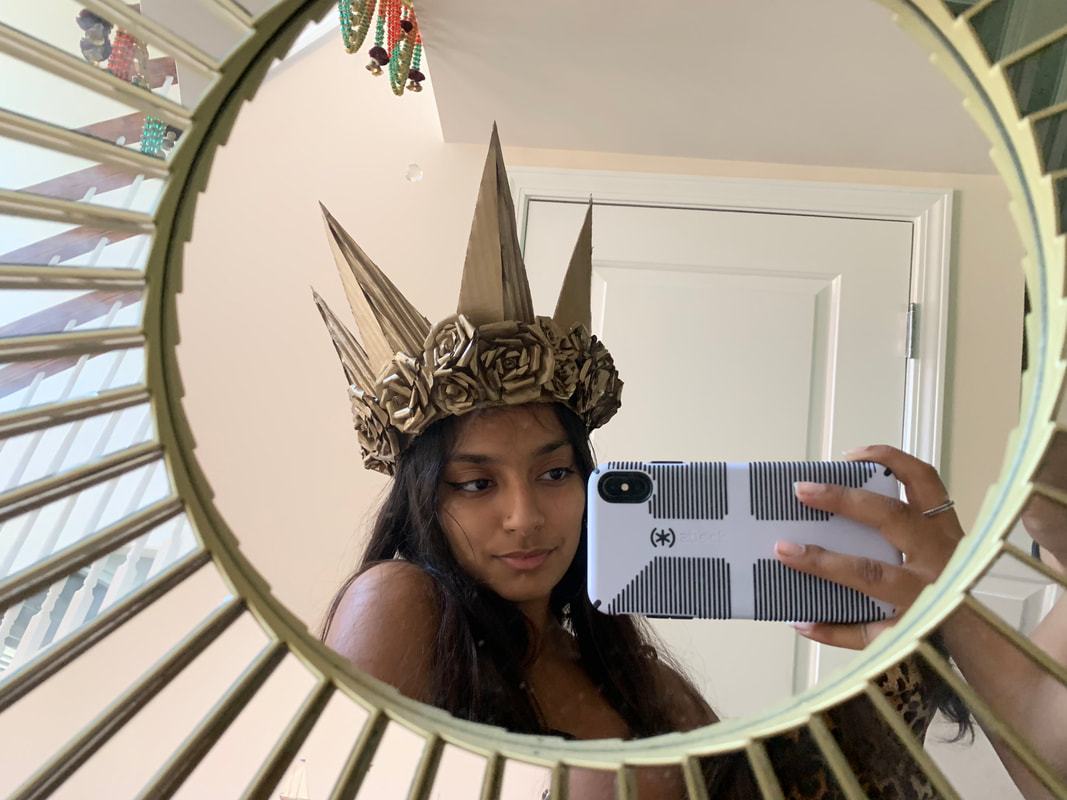
1. In my piece I had success in making the roses look realistic and the arrangement of them on the crown to make it look full and eye catching. I also like how it gives the fake metal effect even when it's made from cardboard.
2. If I were to do it again I might change how I made the base to be a little bit more sturdier which would have saved time later on when I was filling up empty spaces and adding glue or cardboard to keep it stable.
3. To anyone who is starting a project similar to this, I would advise them to use water to help smooth and fold the cardboard especially for the flowers. The water just makes the cardboard loose and easier to work with.

|
|
Positive and Negative Sculpture Blog Post
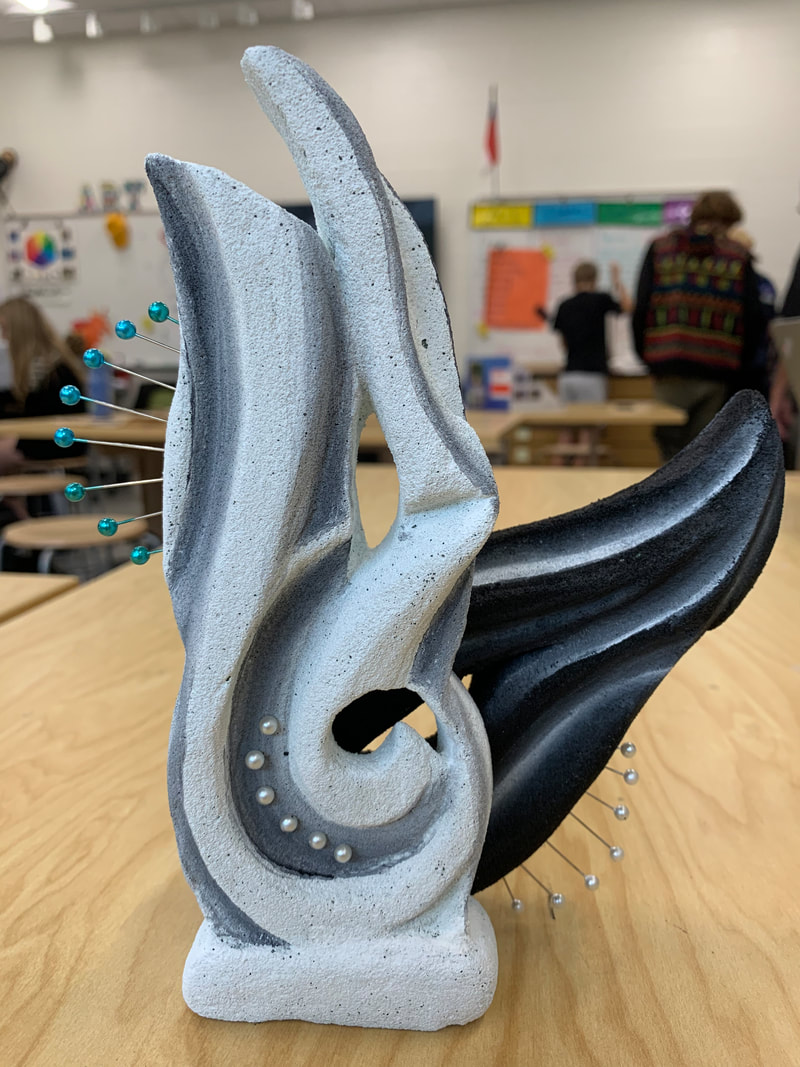
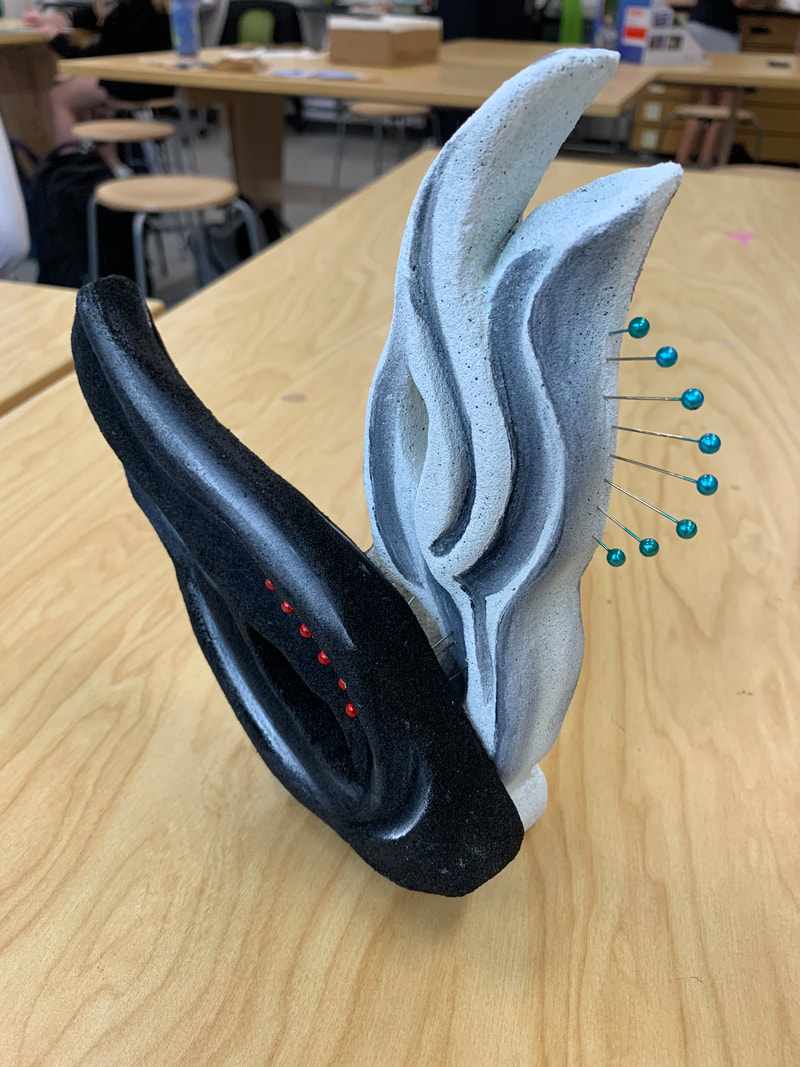
1. For this piece I started with a basic sketch of shapes I wanted to follow with the sculpture in my sketchbook and drew on the foam piece with marker before I started shaving off pieces. I started of with using tools to cut out big pieces of foam and smoothed it out with my fingers and used my fingers to deepen cuts and spaces.
2. Initially I was only going to have the white part of my sculpture and no pins but I realized the foam piece was thicker than what I wanted that part to be. I decided to make the other piece and attach it with sewing pins for the final piece. I overcame the obstacle of having to big a piece of foam by doing this.
3. I chose these colors for my piece because of how contrasting they are and I wanted the two pieces to flow together but also look completely different. I used the opposite paint color to emphasize the curves and deeper areas to really bring out the shape of the foam.
4. I really ended up liking the piece as a whole and the painting was a success to bring out all the shapes. I also like how the pins add a different material to the piece and just add to the shapes as well.
|
|
|
Movement in Paper Sculpture Post
Assignment 1
1. We all split up the different techniques between the three of us evenly. Different techniques out of the board were shown in our individual sculptures too. In the part I finished I used textured surface to make the design.
2. I do feel more familiar with the techniques of paper sculpture after the practice.
Assignment 2
I did not complete the individual project due to working on my cardboard sculpture for long and starting the clay pieces as we had gotten new clay and were supposed to go back to the paper sculptures later.
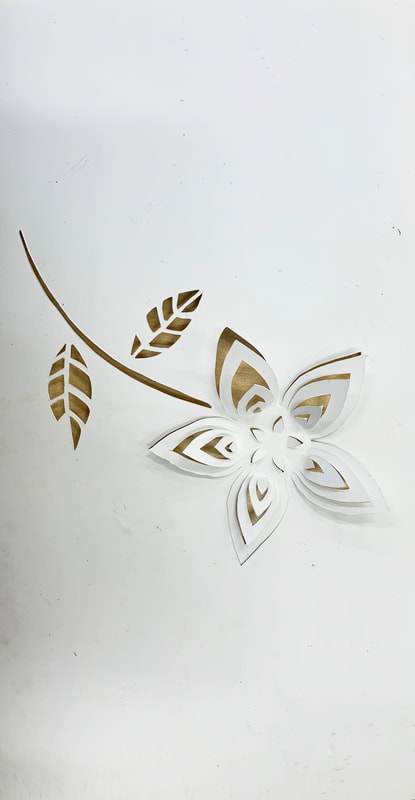
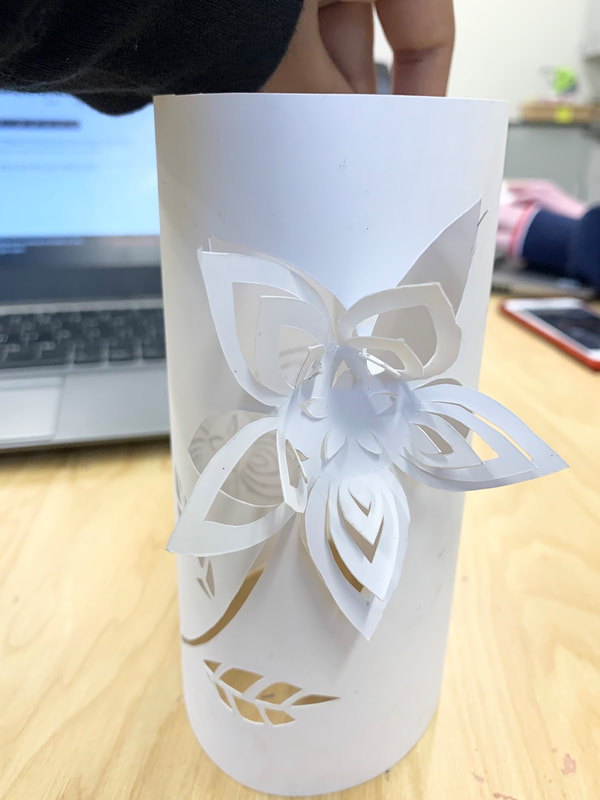
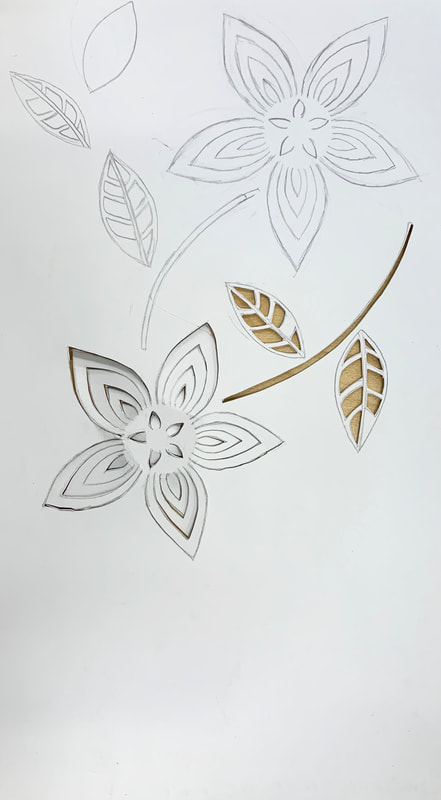
1. The pros of using paper for my sculpture is the availability of the material, flexibility of the material to create the candle like shape, and how easy it is to cut through the paper for the flowers.
2. The cons are the color of the paper is only white so to make a color light from the candle I would have to add another material and that it is easy to mess the cutting because of how thin and fragile paper is.
3. I started by measuring out the rectangle piece I want to cover the candle and then cut it out. I then drew on the designs I wanted to cut out of the flat sheet. After I would've have finished cutting out, I would have glued it together to make the final shape and added maybe origami paper underneath for color of the light.
1. We all split up the different techniques between the three of us evenly. Different techniques out of the board were shown in our individual sculptures too. In the part I finished I used textured surface to make the design.
2. I do feel more familiar with the techniques of paper sculpture after the practice.
Assignment 2
I did not complete the individual project due to working on my cardboard sculpture for long and starting the clay pieces as we had gotten new clay and were supposed to go back to the paper sculptures later.
1. The pros of using paper for my sculpture is the availability of the material, flexibility of the material to create the candle like shape, and how easy it is to cut through the paper for the flowers.
2. The cons are the color of the paper is only white so to make a color light from the candle I would have to add another material and that it is easy to mess the cutting because of how thin and fragile paper is.
3. I started by measuring out the rectangle piece I want to cover the candle and then cut it out. I then drew on the designs I wanted to cut out of the flat sheet. After I would've have finished cutting out, I would have glued it together to make the final shape and added maybe origami paper underneath for color of the light.
|
|
|

|
Frame Post
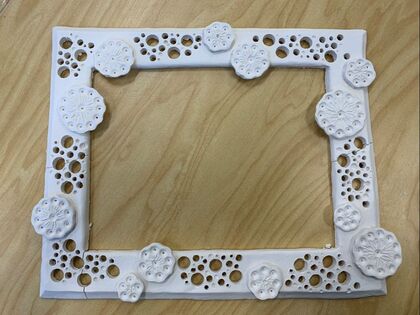
1. The theme of my frame is circles and I used circle holes and small design pieces with circles to show off the theme.
2. I find the design pieces successful as you can see all the details after firing and they really add to the empty spaces of the frame.
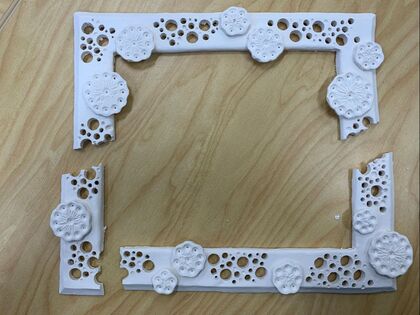
3. I would have changed the thickness of the frame to be more thick so my frame wouldn't break.
4. I started with a slab of clay and cut out the base frame shape using a piece of paper I measured for assistance. Then I started using drill bits of different sizes to make holes in clumps that were spaced across the frame. To fill up the space in between I made smaller pieces of the same design in different sizes separately and scored and slipped the pieces onto the frame. After it was fired once I glazed it and after the second fire I glued the frame back together.
2. I find the design pieces successful as you can see all the details after firing and they really add to the empty spaces of the frame.
3. I would have changed the thickness of the frame to be more thick so my frame wouldn't break.
4. I started with a slab of clay and cut out the base frame shape using a piece of paper I measured for assistance. Then I started using drill bits of different sizes to make holes in clumps that were spaced across the frame. To fill up the space in between I made smaller pieces of the same design in different sizes separately and scored and slipped the pieces onto the frame. After it was fired once I glazed it and after the second fire I glued the frame back together.
|
|
Tripod Mug Post
|
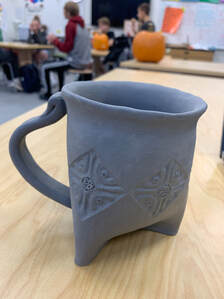
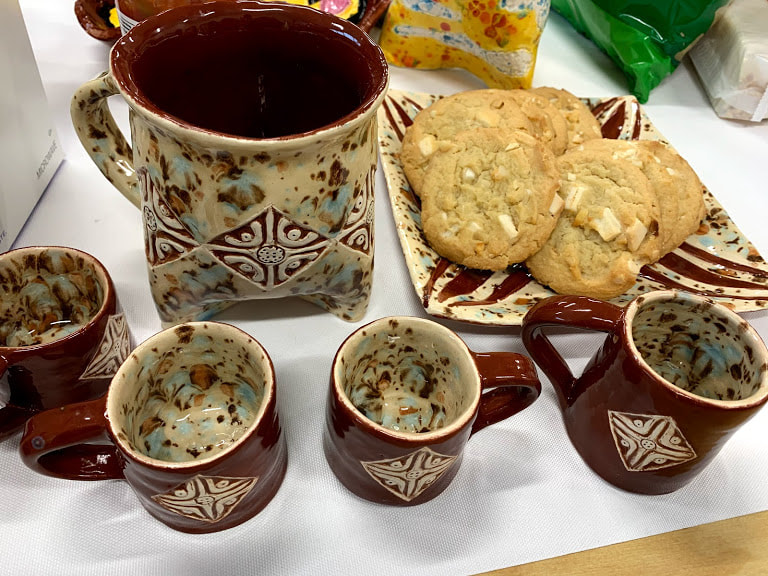
1. To make my mug I started with a piece of paper wrapped around a PVC pipe and a slab of clay I cut into a rectangle that would fit around the pipe. I then scored and slipped the end to create a cylinder shape after I took it off of the pipe. Then I put the mug down on one side to pull together the other end into the tripod shape and used a modeling tool to smooth it out. After that I cut the top of the mug to an angle and smoothed out the shape to be how I wanted it to look like. I let the mug dry a little after and then I scraped out the designs from the mug and shaped a handle. I curved the handle into the shape I wanted and scored and slipped it on so it was ready to be fired.
2. I used a faux pulled handle where I used a carrot shaped piece of clay and started pulling it out on the table using a sponge to make the shape. After that I evened out both sides and curved it to fit the mug and let it dry a bit before attaching it. 3. I find the carving successful because of the clean detail and I would probably change the size of the mug because it is kind of bigger than I wanted. 4. A clay slab is a even and flat rolled out piece of clay that can be cut out of. |
|
|
Pit Fire In Progress Post
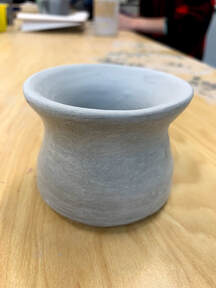
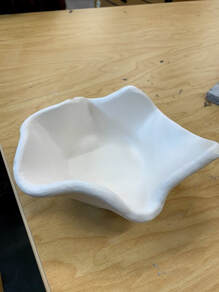
1. For my pit fire pieces I used two techniques, a slab and throwing on the wheel, to create the projects. For the first piece I rolled out the slab and placed it on a cylinder shaped container letting it drape down while smoothing out the outside. For the second piece I threw it on the kick wheel starting with a bigger base that goes inwards as it goes up.
2. It was difficult to start on the wheel as I hadn't had much practice on it. I had to relearn how to center the clay so the piece would be even. When making the other piece I had to make sure it wouldn't crack while draping off the container. I think in the end the most successful things were the shapes and how smooth it turned out.
3. After the pieces were made I had to work on smoothing them out and burnishing them with a rock. I trimmed the piece that I threw on the wheel to make it smooth and get the end result shape. My designs ended up being smaller than what I was going to make them because I didn't have enough time.
|
|
Pit Fire Finished Post
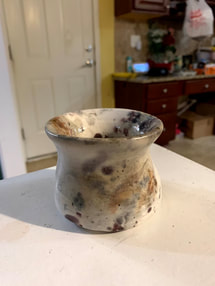
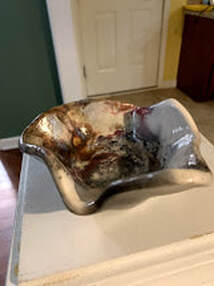
1. The pit fire process starts with the clay piece burnished and then bisque fired to be ready to prepare for the firing. You then take the piece and add natural things around in covered in foil to create the color burned on later on. I used dog food, salt, herbs, eggshells, and some acids. Then you go through the firing process where everything is burned and you wait for the pieces to cool down and clean up the ashes. In the end you use a finishing medium, I used a glossy spray to seal it.
2. My pieces were successful in getting most of the colors I wanted and not cracking in the end. I would have liked if my wheel piece had more color spread out because it does have a noticeable white space.
3. I burned dog food, salt, herbs, eggshells, and the acid that we used to prepare it before the firing.
|
|
Sgraffito In Progress Post
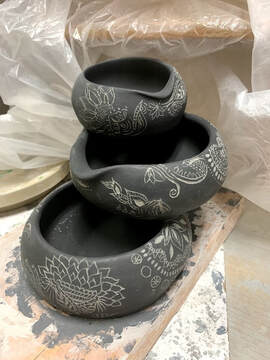
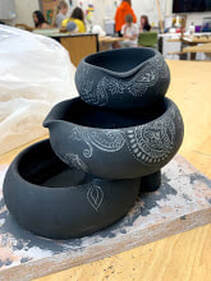
1. I got my idea from a pinterest post I saw. I knew I wanted to create a fountain out of clay and so I was inspired by the structure of a rock fountain I saw and decided to throw the bowls on the wheel and finish it with a sgraffito design. The design I made was inspired by random henna designs that I just thought of.
2. I started with throwing the bowl shapes on the wheel in size order. I made the shape to be wide and curve in a little at the top. After throwing the three bowl I attached them together into a fountain structure and worked on smoothing it out and getting it to attach. I ended up adding a stand in the back as it needed extra support. I then tested the water pump to see where it would and and where I would make hole for a piping structure inside. After I made the holes I softened the clay and started pulling out the spout area on the bowls to guide the water flow. Then I let it dry a little and painted it completely with black underglaze which I then carved out of.
2. I started with throwing the bowl shapes on the wheel in size order. I made the shape to be wide and curve in a little at the top. After throwing the three bowl I attached them together into a fountain structure and worked on smoothing it out and getting it to attach. I ended up adding a stand in the back as it needed extra support. I then tested the water pump to see where it would and and where I would make hole for a piping structure inside. After I made the holes I softened the clay and started pulling out the spout area on the bowls to guide the water flow. Then I let it dry a little and painted it completely with black underglaze which I then carved out of.

|
|
Sgraffito Finished Post
1. I enjoyed carving out the designs as I chose something that I also like to draw and doodle on any paper or sketchbook. I really like how the end result is supposed to look and am excited to finish the clear glaze on top.
2. My piece was definitely something different than anything else I have done so I enjoyed the learning process and how it turned out in the end. I liked the shape and flow of the structure and designs after I finished carving everything out. If I were to change anything, I would put the structure together when the clay was softer because mine cracked a lot since it was too dry.
2. My piece was definitely something different than anything else I have done so I enjoyed the learning process and how it turned out in the end. I liked the shape and flow of the structure and designs after I finished carving everything out. If I were to change anything, I would put the structure together when the clay was softer because mine cracked a lot since it was too dry.